Finding an affordable and reliable WordPress host can be challenging. The hosting market is saturated with cheap alternatives that often fail to perform well. The issue is that you usually get what you pay for.
If you are searching for a high-performance web hosting solution for your upcoming WP project, consider a hosting provider that offers dedicated resources tailored to your needs. However, it may come at a significant cost.
But if you want to save money and still have a high-quality WordPress stack, consider choosing a good VPS hosting with Webinoly script.
Webinoly is an ideal solution for those seeking to balance quality and affordability. With Webinoly, you can enjoy all the benefits of a high-quality WordPress host while having the freedom to manage your servers.
Webinoly frees you from the hassle of server management, enabling you to work seamlessly with WordPress. It helps create modern business-centric WordPress servers with Nginx, Redis, and MariaDB stack.
With Webinoly, you get,
- Free SSL certificates for your sites with Let’s Encrypt.
- HTTP/2 dramatically increases the speed of serving your content.
- PHP 8.1 or 8.2 and support for earlier versions if needed (7.4).
- FastCGI Cache and Redis Object Cache.
- Get an A+ grade on the Qualys (SSL Labs) Test.
- Automatically optimize your server to get the most out of the available resources.
Webinoly provides the following options to manage your server,
- Unique commands to create, delete, disable, and manage all your sites.
- Install WP in any subfolder and support external databases, multisite, and domain mapping.
- Installing SSL Certificates with automatic server configuration.
- Advanced support for cloning your sites for testing purposes.
- A complete suite of tools for backups.
- Protect your site, folder, or file with HTTP Authentication.
- Modify the configuration of your server at any time according to your needs.
- Log viewer in real-time.
In this article, I will guide you through installing Webinoly, which is compatible with LTS versions of Ubuntu. Therefore, you can install it on either Ubuntu 22.04 or 20.04.
I am using a MaxKVM VPS for this tutorial, but you can use any other VPS provider for your websites, such as Vultr or DigitalOcean.
To learn more about hosting types and companies, refer to my guide on how to find the best WordPress hosting. If you’re looking for a speed-optimized web-based interface hosting control panel for your servers, check out CloudPanel.
Webinoly Installation
The installation process for Webinoly is quite simple. All you have to do is connect to your server and execute the following command.
sudo wget -qO weby qrok.es/wy && sudo bash weby 3Once you run the above command, the entire Webinoly stack containing Nginx, MariaDB, and PHP will be installed. Upon completion of the installation, you can get your MySQL password.

Create Your First WordPress Site:
After successfully installing Webinoly, you can set up your first WordPress website with just one command.
sudo site example.com -wpThe above command will create a WordPress website named “example.com.”
⚠️: Please replace “example.com” with your domain name.

Add Default Email Address:
If you prefer, you can save your email address with the following command,
sudo webinoly [email protected] ⚠️: Please replace [email protected] with your email address.
SSL Installation:
Use the following command to obtain a free Let’s Encrypt SSL certificate for your domain,
sudo site example.com -ssl=on⚠️: Please replace “example.com” with your domain name.

Setup Your WordPress Site:
You can now open your website and configure the site title, username, and password.

☑️: For more advanced commands to optimize your sites further, refer to Webinoly’s advanced guide.
Install FastCGI Cache for WP:
Enabling FastCGI is the easiest and most powerful way to optimize WordPress sites. You don’t need any fancy or costly caching plugin to optimize your WP installation. You can enable it with the following command:
sudo site example.com -wpfc⚠️: Please replace “example.com” with your domain name.

Webinoly Server Settings
Setup HTTP Authentication:
HTTP Authentication is required to access wp-admin or wp-login as well as phpMyAdmin. It adds an extra layer of security to your website.
To set up HTTP Authentication, run the following command and enter your desired username and password.
sudo httpauth -add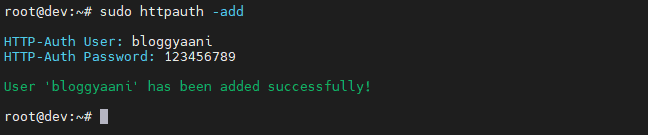
Access your files via SFTP:
Webinoly doesn’t offer a web-based interface, so if you need to upload or modify files on your website, you’ll have to use SFTP. You can enable it by running the following command.
sudo webinoly -login-www-data=on
Would you like to change the SFTP password? Use the following command.
sudo passwd www-data
Accessing phpMyAdmin:
To access phpMyAdmin or other tools, Webinoly uses port 22222, which can be modified with the following command.
sudo webinoly -tools-port=19816⚠️: Please replace “19816” with your desired port address.
You can use the following command to access tools using your existing domain instead of the server IP.
sudo webinoly -tools-site=example.com⚠️: Please replace “example.com” with your domain name.
✅: Now, you can access example.com:19816 from your browser, and any request from a different domain will be blocked.
Security Settings:
We will add a blockhole as the default Nginx response to prevent suspicious traffic.
sudo webinoly -default-site=blackholeAnd if you want to block specific IPs from accessing your website, use the following command.
sudo webinoly -blockip=xx.xx.xx.xx
Extra Settings for Webinoly
Configure UFW to Protect Your Webinoly Server:
Webinoly is a powerful tool for protecting and optimizing WordPress websites. However, it is not equipped with a firewall to protect your servers from attacks.
Webinoly recommends using firewall services, such as UFW, AWS Security Groups, or any other option your hosting provider provides to ensure server security.
I use UFW to protect my servers, and you can do the same by using the following commands,
First, Check UFW Status.
sudo ufw statusSecond, add these ports into allowing ports lists in UFW,
sudo ufw allow 22/tcp
sudo ufw allow 80/tcp
sudo ufw allow 443/tcp
sudo ufw allow 22222/tcp
sudo ufw allow out 587/tcp
sudo ufw allow out 25/tcp
sudo ufw allow out 11371/tcp
Third, run UFW to protect your system,
sudo ufw enableFourth, recheck the status of UFW.
sudo ufw status verbose☑️: I recommend checking out Webinoly’s documentation for more detailed information and examples.
Configure 7G Firewall for Webinoly:
The 7G firewall works with Webinoly’s auth function to protect your WordPress sites against evil bots and common hacking attempts.
It also helps to eliminate the need for bloated security plugins, which can cause your WP database to become bloated and slow down your web server.
The 7G Firewall offers lightweight, server-level protection against a wide range of malicious requests, bad bots, automated attacks, spam, and many other types of threats and nonsense.
Perishable Press
Installation of 7G:
Step 1: Add the files
First, download the 7G Nginx Firewall (ZIP file) and unzip it to get the following files:
- 7g-firewall.conf
- 7g.conf
Create a folder named “7g” in “/etc/nginx/” and move the downloaded file to that location.
Step 2: Include the firewall rules
In the HTTP directive of your main Nginx configuration file, located at “/etc/nginx/nginx.conf“, add the following statement after line 132 or before the “}.” This statement will include the file containing the 7G firewall rules and ensure they are applied to your website.
http {
	.
	.
	.
        ##
        # 7G FireWall
        ##
        include /etc/nginx/7g/7g-firewall.conf;
	.
	.
	.
}
Note: The three vertical dots represent any other existing rules that may be in place. Please do not add the dots to your files, as they are only for illustrative purposes.

⚠️: Please ensure the path is correct based on the directory structure on your server.
Step 3: Include the conditional logic
In your local/site configuration file “/etc/nginx/sites-enabled/example.com,” add the following include statement after line 40 or before the “}.” This will include the file containing the conditional 7G rules.
server {
	.
	.
	.
        # 7G Firewall Started
        include 7g/7g.conf;
        # 7G Firewall End
	.
	.
	.
}
Note: The three vertical dots represent any other existing rules that may be in place. Please do not add the dots to your files, as they are only for illustrative purposes.

⚠️: Please make sure that the path is correct based on the directory structure on your server.
Step 4: Restart the Nginx
You need to restart Nginx or the server after making changes to the configuration for them to take effect.
First, check everything works fine,
nginx -t
Second, restart the Nginx to make 7G work,
sudo service nginx reloadStep 5: Testing
After completing the previous steps, you should have the two Nginx configuration files in place and the server restarted so the new rules are in effect. The next step is to conduct careful inspections to ensure everything works properly.
You must ensure that your website functions correctly and that the 7G Firewall blocks malicious requests as intended.
You can check by adding “localhost” after your WP site URL.

Or, check via the command line,

⚠️: Both of these examples should display a 403 error. If you don’t see the error, then it means that the 7G Firewall is not working correctly.
Default vs Webinoly Optimized WP Comparison
Here is a quick comparison demonstrating the power of Webinoly’s server-level caching without using any caching plugin.
For this comparison, I am using the GeneratePress Construction demo. The test website is hosted on a MaxKVM 1GB VPS, and I am using the GTMetrix Vancouver location to benchmark the website.
Default Webinoly WordPress GTMetrix results:
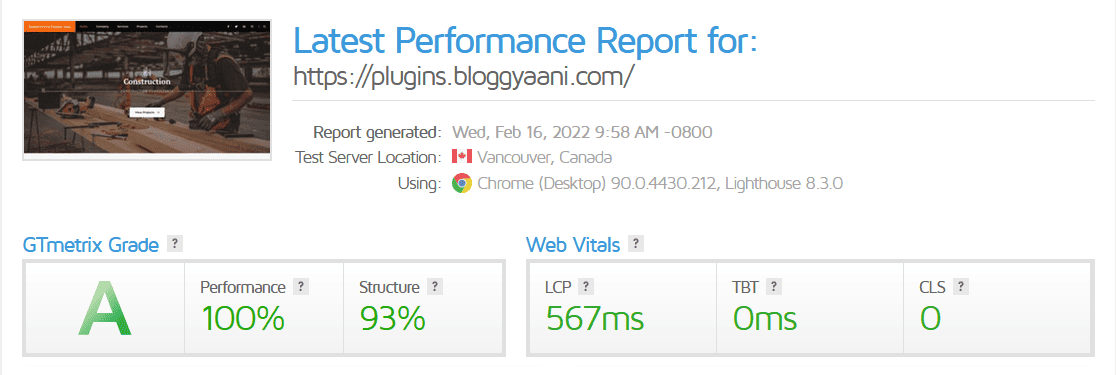
| Performance | 100% |
| Structure | 93% |
| LCP | 567ms |
| First Contentful Paint | 425ms |
| Time to Interactive | 425ms |
| Speed Index | 550ms |
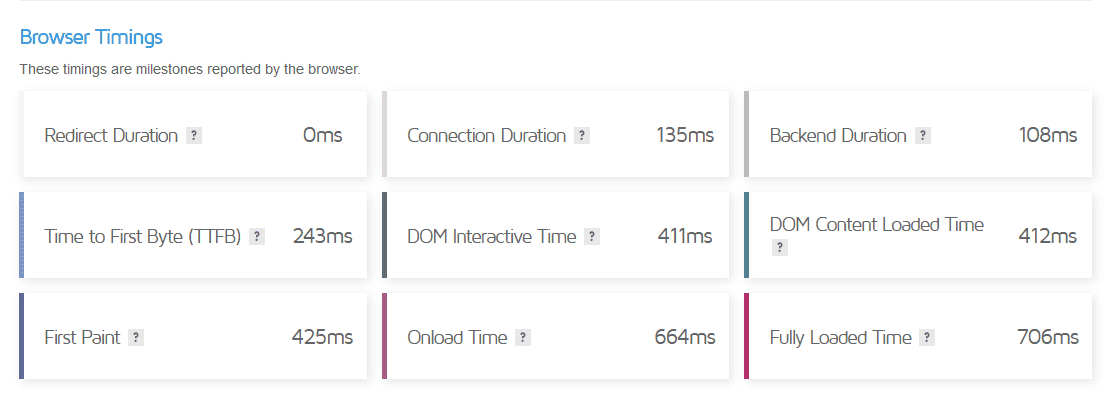
| Backend Duration | 108ms |
| TTFB | 243ms |
| First Paint | 425ms |
| Onload Time | 664ms |
| Fully Loaded Time | 706ms |
| Requests | 26 |
| Page Size(Compressed) | 2.97MB |
| Page Size(Uncompressed) | 3.22MB |
Webinoly FastCGI Cache GTMetrix Result:


| Performance | 100% |
| Structure | 93% |
| LCP | 556ms |
| First Contentful Paint | 441ms |
| Time to Interactive | 441ms |
| Speed Index | 521ms |
| Backend Duration | 36ms |
| TTFB | 170ms |
| First Paint | 412ms |
| Onload Time | 612ms |
| Fully Loaded Time | 651ms |
| Requests | 26 |
| Page Size(Compressed) | 2.97MB |
| Page Size(Uncompressed) | 3.22MB |
Summary
Webinoly comes with pre-optimized settings for WordPress websites, making it suitable for new and experienced users to set up their mission-critical websites.
The table below demonstrates that you do not require premium or free optimization plugins to enhance your WP speed with Webinoly.
| Caching Name | Default WordPress | Nginx FastCGI |
| Performance | 100% | 100% |
| Structure | 93% | 93% |
| LCP | 567ms | 556ms |
| First Contentful Paint | 425ms | 441ms |
| Time to Interactive | 425ms | 441ms |
| Speed Index | 550ms | 521ms |
| Backend Duration | 108ms | 36ms |
| TTFB | 243ms | 170ms |
| First Paint | 425ms | 412ms |
| Onload Time | 664ms | 612ms |
| Fully Loaded Time | 706ms | 651ms |
| Requests | 26 | 26 |
| Page Size(Compressed) | 2.97MB | 2.97MB |
| Page Size(Uncompressed) | 3.22MB | 3.22MB |
With the help of Webinoly, we can remove these types of plugins from our WordPress sites:
- WP Caching Plugins
- Redirection Plugin
- Security Plugin
- Backup Plugin
Managing your servers becomes easy with Webinoly. Try it, and let me know about your experience in the comments below!

YoteKoon
I would like to know if you could complete your guide more because now webinoly works with http/3 there is also 8g firewall which is released. I’d like more information on optimizing php-fpm opcache, redis etc etc. Thank you 🙂
Shaikh Masood Alam
This guide is intended for beginners, which is why it doesn’t cover advanced topics. However, you can apply the 7G steps to 8G and its works fine. Webinoly is already optimized with PHP-FPM, OPcache, and Redis for maximum performance. Currently, I’m using shared hosting for this blog, with no VPS is currently in my hand and since Webinoly’s documentation is behind a paywall, expanding this post into an advanced guide isn’t financially viable at the moment.
YoteKoon
I’ve subscribed, I have a premium account where I have access to content for subscribers, if interested I can share my account with you to update your article! 🙂
Shaikh Masood Alam
Thanks for the offer but its i think its unethical. I appreciate your support!
Max
Thanks for the post!
Is there a way to add a httpauth user only for the WP domain?
This user is for the whole server.
$ sudo httpauth -add
This user won’t work for WP protected folder.
$ sudo httpauth blog.example.com -add
Shaikh Masood Alam
As per webinoly documentation, the correct way to add httpauth for single domain is,
$ sudo httpauth example.com -add
Maggew
This is a pretty nice write-up… good stuff.
I would have liked to see a yet-another-bench-script report by masonr personally because the specs of the VPS are pretty important.
Shaikh Masood Alam
Great Suggestion, i will update post with yet-another-bench-script benchmarks.
YoteKoon
Thank you for the guide, it was a huge help! If you have any other guide on nginx optimization or more guide on webinoly or if I can use a minification plugin it would be cool! 🙂
Shaikh Masood Alam
Check this post about minification and speed enhancer plugins. https://bloggyaani.com/free-plugins-make-wordpress-faster/